Wednesday, May 1, 2024

Color Hues Color Challenge | Sending Prayers

 PRODUCT LINKS BELOW CONTAIN COMPENSATED AFFILIATE LINKS AT NO COST  
 
It's time for us to share the next Hues of Color over at the Color Hues Challenge Blog! The colors that have been chosen for you to create with are Lilac and Lime for the next two weeks! We can't wait to see how you are inspired!
 
Here's my take...
 
My card features the Spellbinders NEW Glimmering Buttercups Glimmer Plate & Stencil Bundle (BD-0840) and a sentiment from Curved Everyday Sentiments Glimmer Plate & Die (GLP-434) foiled with Gold Foil (GLP-014)
 
Card Measurements:
White A2 Top Fold Card Base: 4 1/4" x 5 1/2" (4 1/4" x 11", scored at 5 1/2")
Wild Wisteria Mat: 3 5/8" x 4 7/8"
White Foiled/Stenciled Panel: 3 1/2" x 4 3/4"
Wild Wisteria Sentiment Banner: 2 7/8" x 3/8"
 
Steps to Create Card: 
  • Create White A2 Top Fold Card Base measuring: 4 1/4" x 5 1/2" (4 1/4" x 11", scored at 5 1/2"). 
  • Die Cut Wisteria Mat measuring: 3 5/8" x 4 7/8" using Precision Layering A2 A (S5-487).
  • Take A2 White Panel measuring 4 1/4" x 5 1/2" and foil Glimmering Buttercups Glimmer Plate & Stencil Bundle (BD-0840) with Gold Foil (GLF-014). 
  • Using the Coordinating Stencil from Glimmering Buttercups Glimmer Plate & Stencil Bundle (BD-0840) and ink blend with Light Lilac, Medium Lilac, Key Lime and Jelly Bean Green. Trim panel down to 3 1/2" x 4 3/4" using Precision Layering A2 B (S5-494).
  • Foil "Sending Prayers" sentiment from Curved Everyday Sentiments Glimmer Plate & Die (GLP-434) with Gold Foil (GLF-014). Die Cut out with coordinating die.
  • Assemble Card.
  • Embellish with 4 MM and 6 MM Sparkling Clear Solid Sequins.
Compensated affiliate links used when available. If you place an order after clicking on one of my links, I will receive a small commission at no cost to you. Thank you for your support!  
Make sure to head over to the Color Hues Challenge blog to join the fun and see what my talented teammates have created to inspire you!
Happy Stamping!!

Tuesday, April 30, 2024

Gina K. Designs | April 2024 Release


The Gina K. Designs April 2024 Release is NOW available! You can find the FULL release in the store HERE or direct links at the bottom of the post. 

I'm excited to be joining Gina K. Designs for the April 2024 Release! I have a few cards that I've created to share during tonight's LIVE Release Party over on the Gina K. Designs Facebook Page, YouTube Channel, and Twitch.
 
Before we get started, make sure to check out the NEW Card Kit. It's called Pocket Full of Sunshine Card Kit and it's jammed packed with goodies!!
 

Please note a BIG Change that was implemented with the March 2024 Release to help Gina K with the inventory. Coordinating Die Sets are now ONLY available as a Stamp & Die BUNDLE. For those that don't use dies you can purchase the stamp set individually. Make sure to put the correct version in shopping cart.
 
-----

My cards will feature the NEW Summer Garden stamp set illustrated by Dina Gerner and Ornate Fans illustrated by Arjita Singh.
 
 
 -----
 
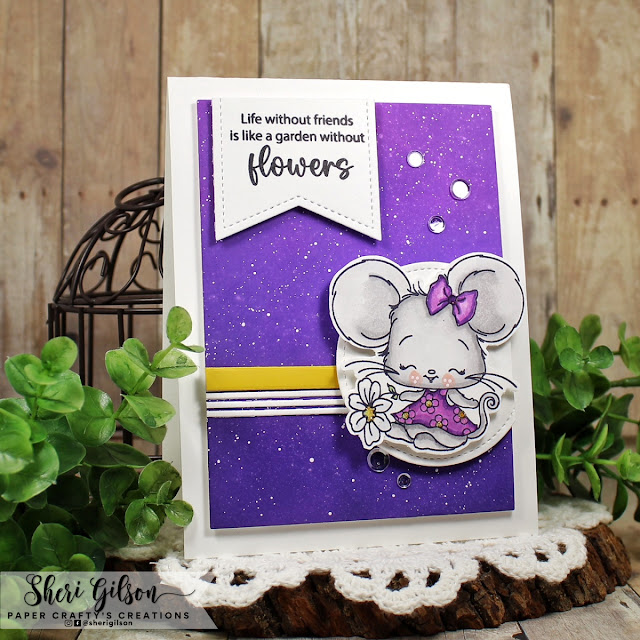
My first card features the NEW Summer Garden stamp set illustrated by Dina Gerner. The background was created with Distress Oxide ink and a little ink splatter. The image was stamped with Amalgam Obsidian ink and colored with Copic markers.
 
Card Measurements:
Heavy White A2 Top Fold Card Base: 4 1/4" x 5 1/2" (4 1/4" x 11", scored at 5 1/25")
Layering White Stitched Banner: 1 15/16" x 1 3/4" - ML #4
Layering White Ink Blended Panel: 3 5/8" x 4 7/8" - ML #2
Wild Dandelion & White Strips: 3 5/8" x 1/4" and 3 5/8" (negative strips) - ML #8
Layering White Stitched Circle: 2 3/8" - Single Stitched Circles
 
Copic Markers Used: 
Mouse Body: T0, T2, T3, T4, T5 
Mouse Cheeks: R02
Dress/Bow: V06, V09, V12, V15
Flower: C1, Y13, Y23 and G82 (stem) 
Compensated affiliate links used when available. If you place an order after clicking on one of my links, I will receive a small commission at no cost to you. Thank you for your support! 
My second card features the NEW Summer Garden stamp set illustrated by Dina Gerner. For the background panels I used Distress Oxide ink and a little ink splattering. The image is stamped with Amalgam Obsidian ink and colored with Copic Markers.
 
Card Measurements:
Heavy White Square Card Base: 4 1/4" x 4 1/4" (4 1/4" x 8 1/2", scored at 4 1/4")
Layering White Ink Blended Stitched Square Panel: 4" x 4" - ML #3
Layering White Ink Blended Stitched Rectangle Panel: 2 1/4" x 3 1/4" - ML #12
Layering White Stitched Circle: 2 3/4" - ML # 8

Copic Markers Used: 
Mouse Body: T0, T2, T3, T4, T5 
Mouse Cheeks: R02
Dress/Bow: BG10, BG11, BG13 and V06
Flower: C1, Y13, Y23 and G82 (stem) 
Compensated affiliate links used when available. If you place an order after clicking on one of my links, I will receive a small commission at no cost to you. Thank you for your support! 
 My third card features the NEW Ornate Fans background stamp illustrated by Arjita Singh. I paired it with the Kindness Silhouettes mini stamp set to create a quick monochromatic card.
 
Card Measurements:
Heavy White A2 Top Fold Card Base: 4 1/4" x 5 1/2" (4 1/4" x 11", scored at 5 1/2")
Black Onyx Mat:3 3/4" x 5" - ML #1
Kraft Panel: 3 5/8" x 4 7/8" - ML #2
Black Onyx Rectangle Mat: 2 3/8" x 4 1/8"  - ML #2
Kraft Stitched Rectangle Panel: 2 1/4" x 4" - ML #2
Compensated affiliate links used when available. If you place an order after clicking on one of my links, I will receive a small commission at no cost to you. Thank you for your support!  
For my final card of the night, I created a Wedding Shower card. It features the NEW Ornate Fans background stamp illustrated by Arjita Singh along with LOVE CAPS die and a sentiment from the New Beginnings mini stamp set. I started off with a piece of layering weight white card stock and stamped the background stamps with embossing ink and heat embossed with clear powder. I this ink blended the panel with Peach Bellini ink.
 
Card Measurements:
Heavy White A2 Top Fold Card Base: 4 1/4" x 5 1/2" (4 1/4" x 11", scored at 5 1/2"
Layering White Stamped/Ink blended Panel: 4 1/4" x 5 1/2"
Vellum Strip: 5 1/2" x 2 1/4" (wrapped around panel and attached in the back)
Peach Bellini L O V E Letters: 5/8" W x 1 3/8" H (approx) - *Diamond Stickles
Peach Bellini Sentiment Strip: 3 3/8" x 3/8" 
White Hearts: 1/2" - *Diamond Stickles
Compensated affiliate links used when available. If you place an order after clicking on one of my links, I will receive a small commission at no cost to you. Thank you for your support!  
Gina K Designs
April 2024 Release
Compensated affiliate links used when available. If you place an order after clicking on one of my links, I will receive a small commission at no cost to you. Thank you for your support! Happy Stamping!!

Saturday, April 27, 2024

Spellbinders | Cheers to You Collection

 PRODUCT LINKS BELOW CONTAIN COMPENSATED AFFILIATE LINKS AT NO COST
 
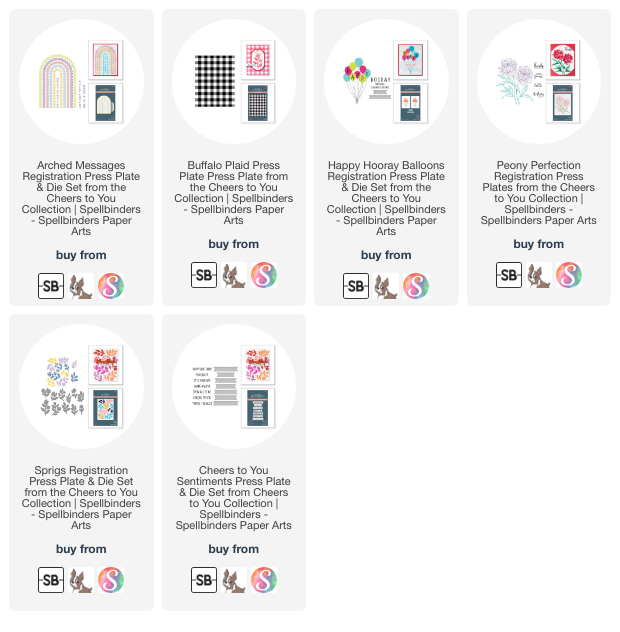
 Spellbinders NEW April 2024 Arrivals are NOW available and can be found in the store HERE. Today I'm featuring the NEW BetterPress Cheers to You Collection.
 
 
Happy Birthday 
From All of Us
Card Measurements:
White A2 Top Fold Card Base: 4 1/4" x 5 1/2" (4 1/4" x 11", scored at 5 1/2")
Kraft Mat: 3 1/2" x 4 3/4"
Porcelain Cotton Pressed Panel: 3 3/8" x 4 5/8"
Kraft Embossed Panel: 2 1/4" x 3"
Porcelain Cotton Pressed Sentiment Strips: 1 13/16" x 3/8" (Happy Birthday) and 1 3/4" x 3/8" (From All Of Us)

Steps to Create Card:
  • Create White A2 Top Fold Card Base measuring: 4 1/4" x 5 1/2" (4 1/4" x 11", scored at 5 1/2").
  • Die Cut Kraft Mat measuring: 3 1/2" x 4 3/4" using Precision Layering A2 A (S5-487).
  • Cut Kraft rectangle measuring: 2 1/4" x 3". Emboss panel with Corrugated 3D Embossing Folder (E3D-037).
  • LetterPress Porcelain Cotton A2 Panel measuring: 4 1/4" x 5 1/2" using Buffalo Plaid (BP-161) with Tawny Brown (Nature Tones BPI-002). Trim panel to measure: 3 3/8" x 4 5/8" using Precision Layering A2 B (S5-494).
  • LetterPress Porcelain Cotton A2 Panel measuring: 4 1/4" x 5 1/2" using Sprigs (BPR-009) with Tawny Brown (Nature Tones BPI-002). Die Cut sprig out with coordinating die. Also die cut the same sprig out of vellum.
  • LetterPress "Happy Birthday" and "From All Of Us" sentiments on Porcelain Cotton A2 Panel measuring: 4 1/4" x 5 1/2" using Cheers to You Sentiments (BP-162) with Tawny Brown (Nature Tones BPI-002).
  • Assemble card.
  • Embellish with White Cord and Rhinestones
Compensated affiliate links used when available. If you place an order after clicking on one of my links, I will receive a small commission at no cost to you. Thank you for your support!  
From All of Us
Card Measurements:
White A2 Top Fold Card Base: 4 1/4" x 5 1/2" (4 1/4" x 11", scored at 5 1/2")
Black Mat: 3 7/8" x 5 1/8"
Porcelain Cotton Pressed Panel: 3 3/4" x 5"
White Mirrored Arch Label Frame: 2 1/2" x 3 1/4" (outside edge of frame) and 2" x 2 9/16" (inside edge of frame)
Vellum Mirrored Arch Label: 2 1/2" x 3 1/4"
White Sentiment Strip: 2" x 3/8"
 
Steps to Create Card:
  • Create White A2 Top Fold Card Base measuring: 4 1/4" x 5 1/2" (4 1/4" x 11", scored at 5 1/2").
  • Die Cut Black Mat measuring: 3 1/2" x 4 3/4" using Precision Layering A2 B (S5-494).
  • Create White Frame using Mirrored Arch Labels (S5-613) to measure: 2 1/2" x 3 1/4" (outside edge of frame) and 2" x 2 9/16" (inside edge of frame).
  • Die Cut Vellum Arch Label using Mirrored Arch Labels (S5-613) measuring: 2 1/2" x 3 1/4". 
  • LetterPress Porcelain Cotton A2 Panel measuring: 4 1/4" x 5 1/2" using Buffalo Plaid (BP-161) with Black (Regal Tones BPI-003). Trim panel to measure: 3 3/8" x 4 5/8" using Precision Layering A2 A (S5-487).
  • LetterPress Porcelain Cotton A2 Panel measuring: 4 1/4" x 5 1/2" using Sprigs (BPR-009) with Black (Regal Tones BPI-003). Press 2 sprigs and die cut out with coordinating die.
  • LetterPress "From All Of Us" sentiment on Porcelain Cotton A2 Panel measuring: 4 1/4" x 5 1/2" using Cheers to You Sentiments (BP-162) with Black (Regal Tones BPI-003).
  • Assemble card.
  • Embellish with Black Cord and Sparkling Clear Solid Sequins.
Compensated affiliate links used when available. If you click on one of my links, I will receive a small commission at no cost to you. Thank you for your support! Spellbinders
Cheers to You Release
April 2024
Compensated affiliate links used when available. If you place an order after clicking on one of my links, I will receive a small commission at no cost to you. Thank you for your support!
Happy Stamping!!

Friday, April 26, 2024

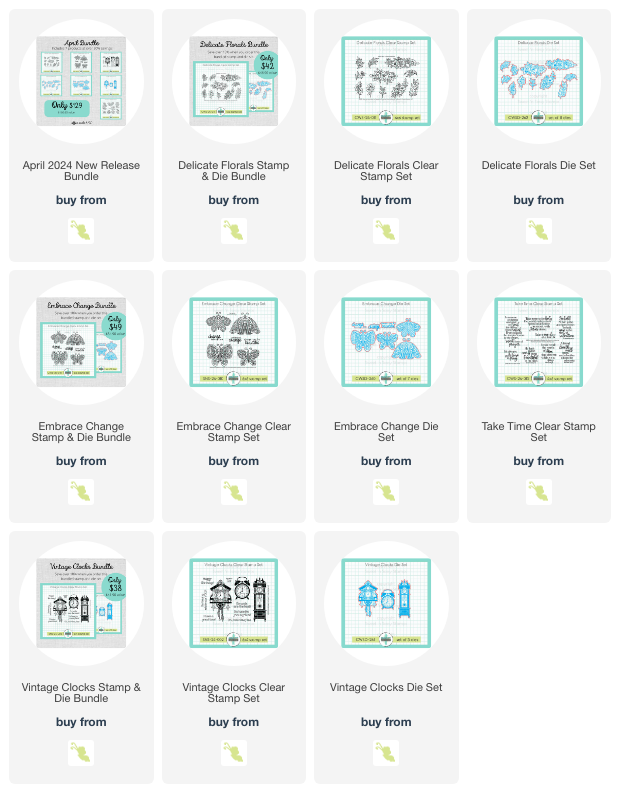
Creative Worship by Sweet 'N Sassy Stamps | Delicate Florals

  PRODUCT LINKS BELOW CONTAIN COMPENSATED AFFILIATE LINKS AT NO COST
 
 Happy Friday Sweet Friends!
 
 
I created a Mother's Day card featuring the NEW Delicate Florals Stamp & Die Bundle along with the For My Mother stamp set and Diamond Tile Stencil.
 
Card Measurements:
White A2 Top Fold Card Base: 4 1/4" x 5 1/2" (4 1/4" x 11", scored at 5 1/2")
Layering Weight White Stenciled Panel: 3 3/4" x 5"
Sweet Corn Arch Panel: 2 1/2" x 3 3/4"
White Arch Panel: 2 1/4" x 2 1/2"

Copic Markers Used: 
Pink: R81, R83, R85
Yellow: Y13, Y15, YR23
Green: YG03, YG17

Steps to Create Card:
  • Create a White Top Fold Card Base measuring: 4 1/4" x 5 1/2" (4 1/4" x 11", scored at 5 1/2").
  • Cut Layering Weight White A2 Panel measuring: 4 1/4" x 5 1/2" and use Diamond Tile Stencil with Sweet Corn ink. Trim panel to measure: 3 3/4" x 5".
  • Die Cut Sweet Corn Arch Mat with Essential Arches Die. 
  • Die Cut White Arch Panel with Essential Arches Die. Stamp sentiment using For My Mother stamp set using Black ink.
  • Stamp floral images from Delicate Florals Stamp & Die Bundle with Black ink and color with your favorite coloring medium. I used alchol friendly ink and colored with Copic Markers. Colors used are listed above. Die cut images out with coordinating die or fussy cut out. 
  • Assemble Card.
  • Embellish with Bumble Bee Pearl Mix
Compensated affiliate links used when available. If you place an order after clicking on one of my links, I will receive a small commission at no cost to you. Thank you for your support! Sweet 'N Sassy Stamps
April 2024 Release
Compensated affiliate links used when available. If you place an order after clicking on one of my links, I will receive a small commission at no cost to you. Thank you for your support!
Happy Stamping!!

Thursday, April 25, 2024

Spellbinders | Cheers to You Collection

 PRODUCT LINKS BELOW CONTAIN COMPENSATED AFFILIATE LINKS AT NO COST
 
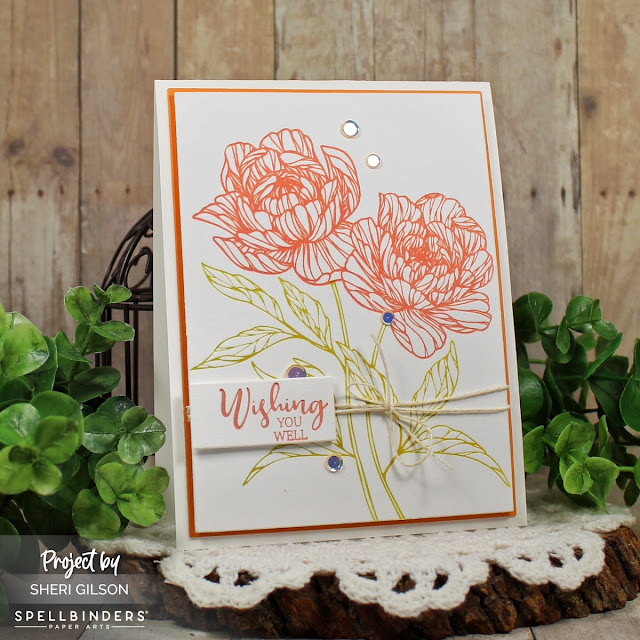
 Spellbinders NEW April 2024 Arrivals are NOW available and can be found in the store HERE. Today I'm featuring the NEW BetterPress Cheers to You Collection.
 
My card features the NEW Peony Perfection Registration Press Plate (BPR-004). Have you used a Registration Press Plate? Instead of one large plate, you receive multiple press plates and a template which allows you the ease to ink up with multiple colors of ink.
 
Card Measurements:
White A2 Top Fold Card Base: 4 1/4" x 5 1/2" (4 1/4" x 11", scored at 5 1/2")
Persimmon Mat: 4" x 5 1/4"
Porcelain BP Cotton Panel: 3 7/8" x 5 1/8"
Porcelain BP Cotton Sentiment Strip: 1 3/4" x 3/4"
 
Steps to Create Card:
  • Create White A2 Top Fold Card Base measuring: 4 1/4" x 5 1/2" (4 1/4" x 11", scored at 5 1/2").
  • Die Cut Persimmon Mat measuring: 4" x 5 1/4" using Precision Layering A2 A (S5-487).
  • Cut A2 Porcelain BP Cotton Panel measuring: 4 1/4" x 5 1/2" and LetterPress the Peony Perfection Registration Press Plate (BPR-004) using Apricot (Desert Sunset BPI-013) and Peridot (Tropical BPI-022). Trim panel to measure: 3 7/8" x 5 1/8" using Precision Layering A2 B (S5-494).
  • LetterPress "Wishing You Well" sentiment from the Peony Perfection Registration Press Plate (BPR-004) using Porcelain BP Cotton with Apricot (Desert Sunset BPI-013) ink.
  • Assemble card.
  • Embellish with White Cord (SCS-259) and Pearlescent Peach Solid Confetti.
 
Compensated affiliate links used when available. If you place an order after clicking on one of my links, I will receive a small commission at not cost to you. Thank you for your support! Spellbinders
Cheers to You Collection 
April 2024 Collection
Compensated affiliate links used when available. If you place an order after clicking on one of my links, I will receive a small commission at no cost to you. Thank you for your support! Happy Stamping!!